A customer recently asked us for help with a discovery that they didn’t know how to create. When we investigated it, the solution was not obvious but interesting. We think other customers may find this approach to be useful. While they won’t have the exact same requirements, the way we solved the issue should be useful for many other scenarios.
If you prefer to watch this demo click here: https://youtu.be/WrDO1hSPHdE
Scenario
We can’t share the exact customer scenario, but we can put something similar together and show the same sort of solution. (We call this “filing the serial numbers off”.)
For our scenario we want to discover multiple class instances based on one or more keys in the registry. Let’s look at an example:
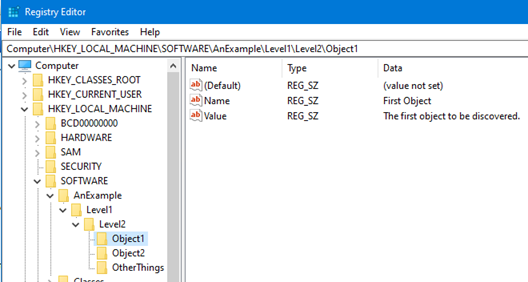
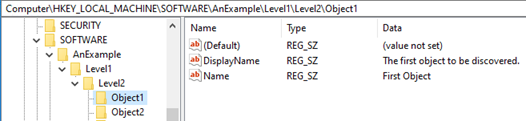
In the registry, under HKEY_LOCAL_MACHINE\SOFTWARE\AnExample\Level1\Level2 we see we have several objects that we want to discover. We only want the objects starting with “Object” and should ignore “OtherThings”. For each discovered object we want the Name and Value properties as well.
The problem is that the built-in SCOM registry discovery is only set up to discover a single key or item, but not several items under a parent key. To do that, we will need to write a PowerShell script and use script discovery (details follow).
But we are still going to use registry discovery. We are going to find computers with the correct folder structure. We only care about the existence of the folder structure. When those class instances are discovered, we can use those as the target for the script discovery. Registry discovery is relatively low cost, compared to script discovery (which isn’t that bad). We refer to this as a “seeded discovery”.
We’re going to create a new management pack, called Silect.Demo.Discovery for this demo. In general, you should create separate management packs for each application or device to be monitored, rather than creating big monolithic MPs for several unrelated applications or devices.
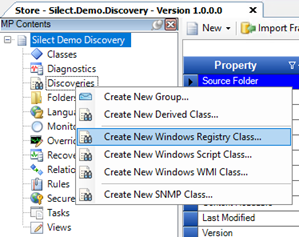
In MP Studio we create the first registry discovery by right-clicking on the Discoveries item and selecting Create New Windows Registry Class…
In the Introduction page, we specify the computer with the registry information that we will browse. Click Next.
In the Registry Entries page, we click the Browse button to browse the registry. We navigate down to the Level1 entry, and select the Level2 key on the right-hand side. Then we can click the Add button to add the Level2 key to the selected registry entries.
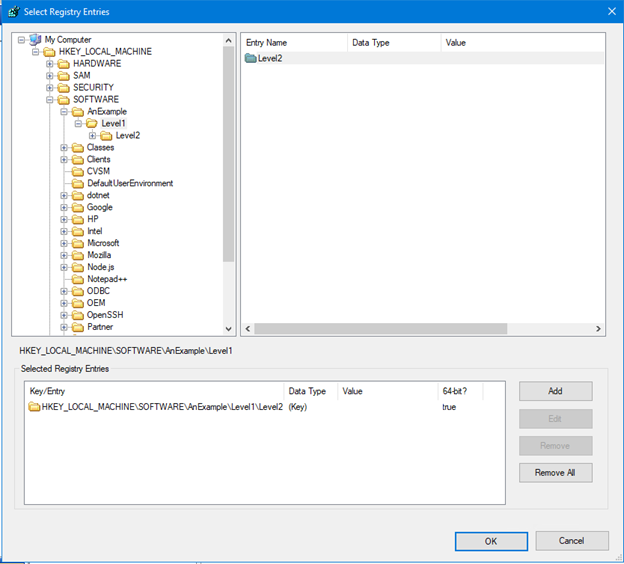
Click OK and we return to the Registry Entries page, with the Level2 key selected. Click Next.

The default values suggested for the remaining pages are fine, but feel free to change anything you need to change. We will change the class Display Name to Silect Demo Registry Class (to make it easy to find). And a similar change for the discovery Display Name. Click through to the last page and click Finish. The registry discovery is now created.
At this point you may want to save the MP and deploy that version to SCOM, to allow it to do the discovery of the registry classes while we work on the rest of the solution. (One reason for doing this is that when we add the script discovery, it will be able to run immediately and we won’t have to wait for SCOM to complete two discoveries in the right order, which can take hours.)
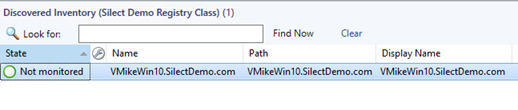
Once the discovery is complete, you should see the proper classes discovered on the appropriate systems in the Discovered Inventory view.
Next we need to create the script which will do the final discovery. Here’s the complete script and then we’ll discuss interesting bits below.
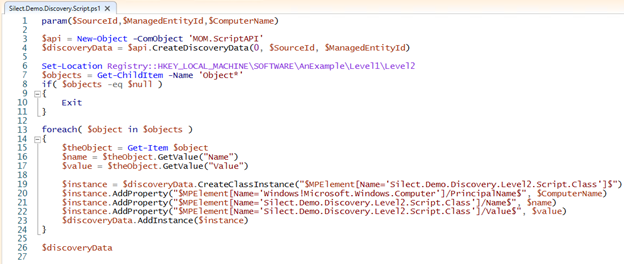
The first couple of lines (up to line 4) are boiler-plate code that all script discoveries need.
Lines 6 through 11 access the registry and get the “objects” we are interested in. The -Name clause on line 7 ensures that we only get the items we are really interested in. The $null test ensures that if there are no object we return nothing to SCOM (so it doesn’t discover anything).
Line 13 just iterates over all the registry entries we are interested in. For each loop, the $object variable contains the name of the registry keys and values we want. Like the following:
Lines 15 through 17 get the actual registry object and then get the specific values for the Name and Value.
Lines 19 through 23 create a new instance of the class, populate the property values, and then add it to the list of instances to return. The class name specified in the CreateClassInstance call will be used by the wizard as the name of the class to create (since the script and MP must be consistent about this). The AddProperty lines are used by the wizard to create class properties and these lines specify the values to use.
Line 26 is the last line of the script and just returns the discovery data to SCOM (where SCOM processes it to create the actual class instances you see in SCOM).
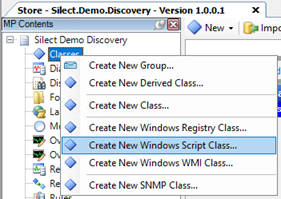
Back in MP Studio, we right-click on the Discoveries item again, but this time we select Create New Windows Script Class.
In the Script page we use the Browse button to load the script we discussed above.
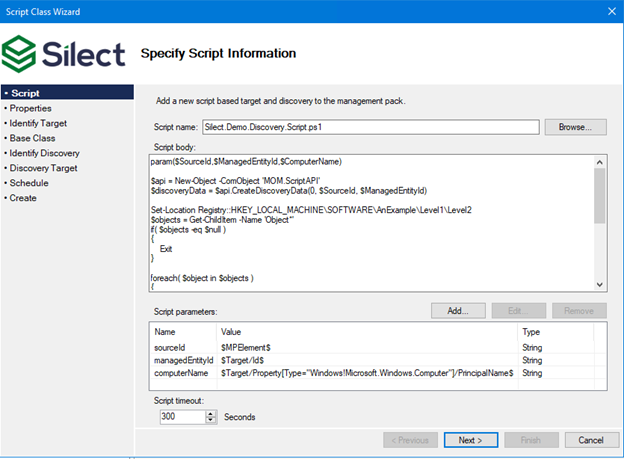
Note that the script parameters are already filled in for you with the correct values to use for a discovery script. Click Next.
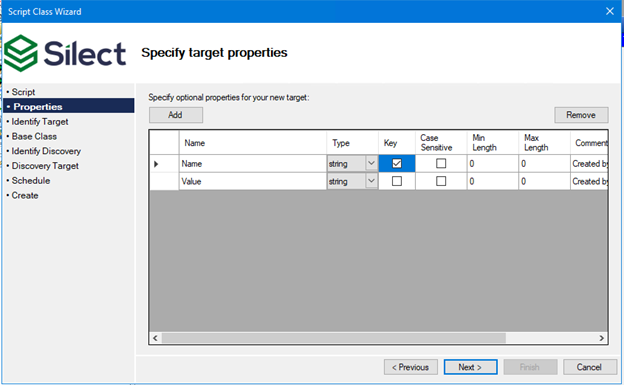
In the Properties page you will see that the wizard determined which properties you wanted to add to your class and automatically included them. The one change to make here is to make the Name property a key property, so that there can be several instances of this class per computer.
Click Next. The remaining pages will have acceptable suggestions for values, but you are free to change them as required. The Display Name for the class is probably something that should be changed (I changed it to Silect Demo Script Class, just to be consistent with the previous class, but you will certainly want to use better names).
In the Discovery Target page, you will want to change the Target to the previous class we created (Silect Demo Registry Class). This results in the script discovery only running on systems which are already known to contain the proper registry entries.
The Schedule page defaults to running the discovery once a day. That’s usually a good value, but if you didn’t already deploy the earlier discovery, you may want to use a shorter time to ensure that the script discovery runs soon after the registry discovery finds systems where this is to run. You can do that in the discovery wizard, or you could create an override later.
Deploy this new version of the MP to SCOM. In a few minutes, SCOM will distribute this MP to the appropriate systems, run the discoveries, and discover the script class instances.

And just like that, we have SCOM discovering the objects we want and can now start to create monitors for those objects, as needed.
